Step-by-Step Instructions
Step 1: Prep the Pan
Line a 9×9-inch square baking pan with parchment paper or lightly grease it with cooking spray. Set aside.
Step 2: Make the Sugar Mixture
In a medium-sized saucepan, combine the sugar, honey, water, and butter. Stir gently over medium heat until the sugar dissolves completely.
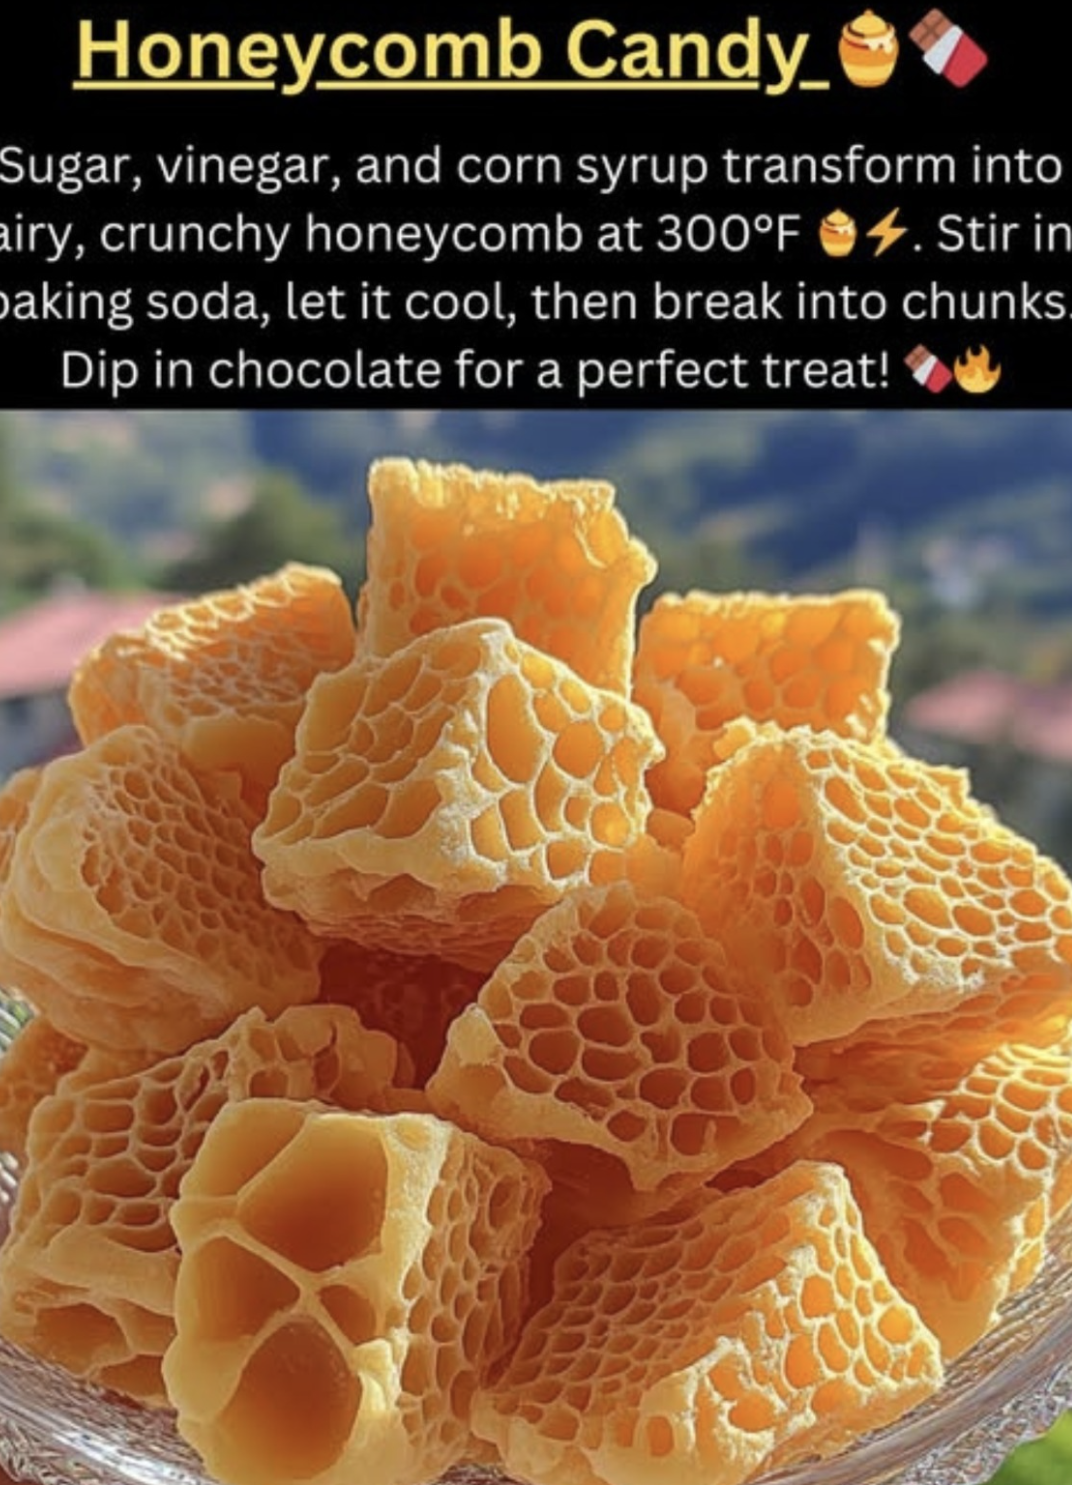
Once the sugar has dissolved, stop stirring and let the mixture boil undisturbed. Use a candy thermometer to monitor the temperature. Cook until the mixture reaches 300°F (150°C) —the hard crack stage.
Step 3: Add the Baking Soda
Remove the saucepan from the heat immediately once the candy reaches the correct temperature.
Quickly whisk in the sifted baking soda. Be careful, as the mixture will bubble up dramatically due to the chemical reaction. Whisk just until combined—do not overmix, as you want to preserve the airy texture.
Step 4: Pour and Cool
Immediately pour the bubbling mixture into the prepared pan. Do not spread it, as this can deflate the bubbles. Let it set at room temperature for 1–2 hours , or until completely cool and hardened.
Step 5: Break and Serve
Once cooled, lift the candy out of the pan using the parchment paper and break it into irregular pieces with your hands or a knife.
If desired, dip the pieces in melted chocolate and let them set on a parchment-lined tray.
Why This Recipe Works
Baking Soda Magic : When added to the hot sugar mixture, baking soda releases carbon dioxide gas, creating thousands of tiny bubbles that give the candy its signature airy texture.
Hard Crack Stage : Cooking the sugar to 300°F ensures the candy sets firmly and has a satisfying crunch.
Golden Flavor : Honey or golden syrup adds depth and richness to the caramelized sugar.
Variations to Try
Chocolate-Coated : Dip half or all of the candy pieces in melted chocolate for an extra indulgent treat.
Flavored Twists : Add a pinch of sea salt, cinnamon, or vanilla extract for a unique flavor profile.
Nutty Addition : Sprinkle chopped nuts (like almonds or pistachios) over chocolate-coated pieces for added crunch.
Mini Versions : Break the candy into smaller pieces and use them as toppings for sundaes, cakes, or brownies.
Spiced Honeycomb : Add a pinch of chili powder or cayenne for a spicy-sweet kick.
Tips for Success
Avoid Stirring After Boiling : Stirring the sugar mixture after it begins to boil can cause crystallization, resulting in grainy candy.
Work Quickly : Once the baking soda is added, act fast to pour the mixture into the pan before it sets.
Storage : Store the candy in an airtight container at room temperature for up to 1 week. Adding silica gel packets can help prevent moisture from softening the candy.
Serving Suggestions
Snack Time : Enjoy as a standalone treat with coffee or tea.
Romantic Touch : Package in clear cellophane bags tied with ribbon for a charming homemade gift.
Dessert Upgrade : Crush the candy and sprinkle it over ice cream, brownies, or cheesecake for added crunch.
Final Thoughts
This Honeycomb Candy is a magical treat that’s as fun to make as it is to eat. Its crunchy texture, golden hue, and rich caramel flavor make it a standout snack or dessert topping. Whether you’re gifting it to loved ones, using it to elevate your desserts, or simply enjoying it as a sweet treat, this candy is sure to impress.
Your turn! Have you ever made homemade candy before? Share your favorite variations or serving ideas below. 🍯
