-
1 to 1½ cups dark, milk, or white chocolate chips (or chopped chocolate bars)
-
Optional: 1 teaspoon coconut oil or vegetable shortening (for extra shine and smoothness)
-
Balloon molds or small metal ladles, spoons, or the back of silicone cupcake molds
-
Nonstick spray or light oil
-
Parchment paper or a nonstick baking mat
Preparation (Step-by-Step Instructions):
1. Melt the Chocolate:
-
Place chocolate and optional oil in a heat-safe bowl.
-
Melt using a double boiler or microwave in 20-second bursts, stirring between intervals until smooth.
-
Let the chocolate cool slightly so it’s thick but still pourable.
2. Prep Your Mold:
-
If using balloons, inflate small water balloons to the desired size and wash thoroughly.
-
If using ladles or spoons, spray the underside lightly with oil to prevent sticking.
3. Shape the Baskets:
Balloon Method:
-
Dip the bottom of each balloon into the melted chocolate.
-
Place upright on a parchment-lined tray and let cool. Repeat for thicker walls, if needed.
-
Chill in the fridge for 30 minutes. Once set, pop the balloons and carefully peel them out.
Spoon or Ladle Method:
-
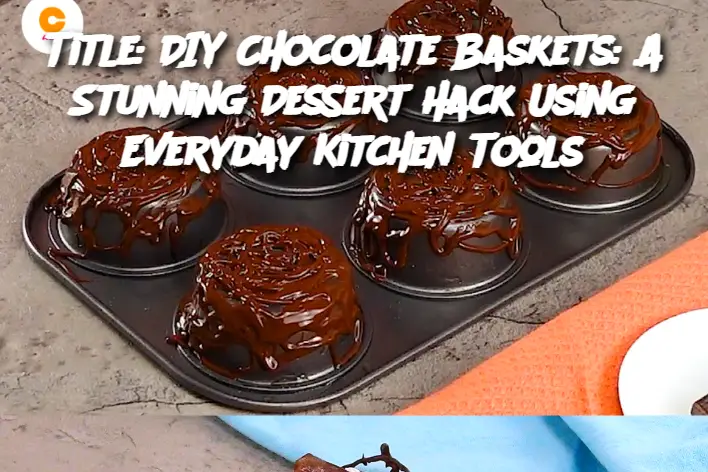
Spoon or drizzle chocolate in crisscrossed layers over the rounded backs of greased ladles or spoons.
-
Chill until firm, then gently lift off.
4. Set and Serve:
-
Let baskets set fully in the fridge for 30–60 minutes.
-
Fill with whipped cream, mousse, fresh berries, mini desserts, or even gelato.
-
Serve immediately or keep chilled until ready to use.
Serving and Storage Tips:
-
Serve cold to keep the chocolate stable, especially in warm environments.
-
Handle gently to avoid fingerprints or cracks.
-
Store unfilled baskets in an airtight container in the fridge for up to 1 week.
-
Avoid placing in direct sunlight or near heat sources.
Variants (Fun Ways to Customize):
-
Marbled Baskets: Use a mix of white and dark chocolate for a swirl effect.
-
Flavored Chocolate: Add a drop of peppermint, orange, or almond extract to the melted chocolate.
-
Colorful Coating: Sprinkle edible glitter, crushed nuts, coconut flakes, or mini sprinkles while the chocolate is still wet.
-
Themed Shapes: Drizzle chocolate into heart, star, or nest-like patterns using piping bags.
-
Mini Cups: Use the back of silicone ice cube trays for bite-sized versions.
FAQ:
Q: Can I use candy melts instead of chocolate?
A: Yes! Candy melts are easy to work with and come in fun colors—perfect for themed events.
Q: What if my chocolate cracks or breaks?
A: It happens! You can patch small cracks with melted chocolate, or remelt and try again—practice makes perfect.
Q: Do I have to use balloons?
A: Nope! Ladles, spoons, and cupcake molds work great. Balloons offer a rounder, bowl-like shape but aren’t essential.
Q: Can I freeze chocolate baskets?
A: It’s not recommended—freezing can cause chocolate to bloom (turn whitish). Refrigeration is best.
Q: What fillings work well in these baskets?
A: Whipped cream, mousse, pudding, berries, ice cream, or mini brownies are perfect options. Just avoid anything too hot or liquid-heavy.
Conclusion:
These DIY Chocolate Baskets are more than just a dessert—they’re a showstopping experience. With a bit of melted chocolate and a little creativity, you can create elegant, edible bowls that elevate any treat. Whether you’re impressing guests or just having fun in the kitchen, this simple trick turns basic ingredients into gourmet presentation. 🍫✨
