-
Preheat the Oven: Start by preheating your oven to 350°F (175°C). Grease a 9×9-inch baking pan or line it with parchment paper for easy removal of the bars once they are baked.
-
Prepare the Cherry Filling: If you’re using fresh or frozen cherries, chop them into small pieces. Place the cherries in a bowl and toss them with 1 tablespoon of cornstarch. This will help thicken the juices as they bake. Add a splash of lemon juice if you like a slight tang. If using cherry jam, simply set it aside for later.
-
Make the Bar Batter: In a large mixing bowl, beat together the softened butter, vegetable oil, and sugar until the mixture is light and fluffy. This should take about 2-3 minutes with an electric mixer. Add the egg and vanilla extract, and continue beating until well combined.
-
Add Dry Ingredients: In a separate bowl, whisk together the flour, baking powder, and salt. Gradually add this dry mixture into the wet ingredients, mixing until just combined. The batter will be thick.
-
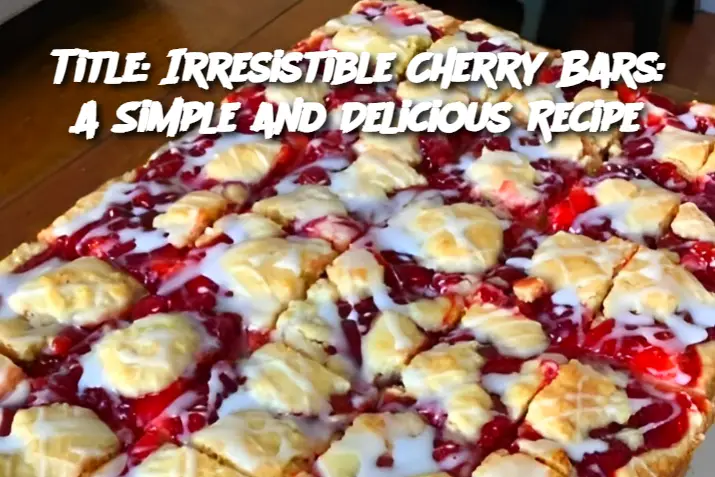
Assemble the Cherry Bars: Spread about two-thirds of the batter evenly into the bottom of the prepared pan. You can use a spatula to smooth it out. If you’re using cherry jam, spread it on top of the batter in a thin layer. If you’re using fresh or frozen cherries, spoon them over the batter, spreading them evenly across the surface. Then, drop spoonfuls of the remaining batter on top of the cherries. Don’t worry if it’s not perfectly smooth; the batter will spread out as it bakes.
-
Bake the Cherry Bars: Bake for about 30-35 minutes, or until the edges are golden brown and a toothpick inserted into the center comes out clean (it’s okay if a few crumbs stick due to the cherries). Let the bars cool completely in the pan on a wire rack before slicing them into squares.
Serving and Storage Tips:
-
Serving Tip: Serve these cherry bars at room temperature for the best texture. They can be enjoyed as a snack, dessert, or even paired with a cup of coffee or tea for an afternoon treat.
-
Storage Tip: Store the cherry bars in an airtight container at room temperature for up to 3-4 days. For longer storage, keep them in the refrigerator for up to a week. You can also freeze these bars for up to 3 months. Just wrap them tightly in plastic wrap or foil and place them in a freezer-safe container.
Variants:
-
Cherry Almond Bars: Add 1/2 teaspoon of almond extract to the batter for a nutty twist. You can also sprinkle some sliced almonds on top of the cherry layer before baking for added texture.
-
Cherry Coconut Bars: Add 1/4 cup of shredded coconut to the batter to give these bars an extra tropical flavor. The coconut pairs wonderfully with the tartness of the cherries.
-
Chocolate Cherry Bars: For a decadent treat, add 1/2 cup of mini chocolate chips to the batter. The chocolate and cherries make an irresistible combination!
FAQ:
Q: Can I use canned cherries for this recipe? A: Yes, you can use canned cherries. Just make sure to drain them well and reduce the juice before adding them to the batter. You can also use cherry pie filling if you want a more consistent texture.
Q: Can I make this recipe gluten-free? A: Yes, you can substitute the all-purpose flour with a gluten-free flour blend. Be sure to check that your other ingredients (such as baking powder) are also gluten-free.
Q: How do I know when the cherry bars are done? A: The bars should be golden brown around the edges, and a toothpick inserted into the center should come out clean or with just a few crumbs. If you see wet batter, they need more time to bake.
Q: Can I make these bars in advance? A: Yes, you can prepare these cherry bars ahead of time. Bake them, allow them to cool, and store them in an airtight container for up to 3-4 days. They can also be frozen for longer storage.
